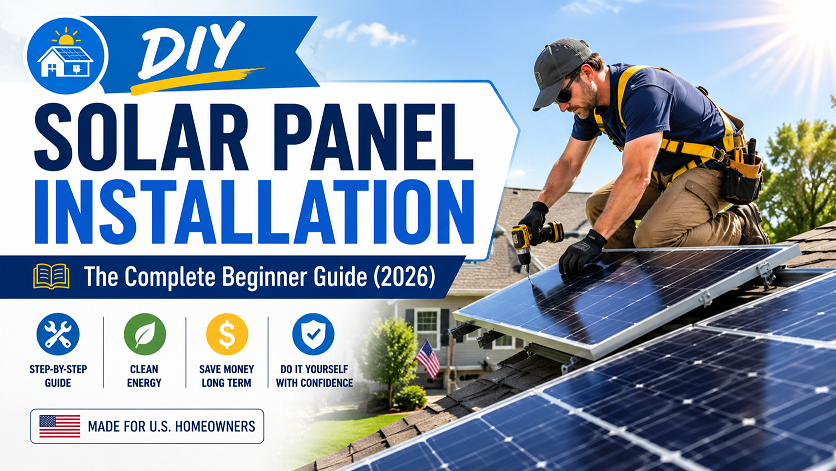
DIY Solar Panel Installation: The Complete Beginner Guide (2026)
DIY solar panel installation can save US homeowners $8,000–$15,000 compared to hiring a professional installer. In 2026, labor and soft costs make up 40–60% of a typical $30,000 professional quote. A complete 7 kW DIY system costs $6,000–$10,000 before the 30% federal tax credit. The physical installation takes 2–5 days for a two-person team, but total calendar time from permits to utility Permission to Operate (PTO) runs 8–16 weeks. This guide covers every step: roof assessment, permits, racking, wiring, inspections, and utility approval.
Installing solar panels yourself can save you $8,000 to $15,000 compared to hiring a professional installer. In 2026, labor and soft costs — overhead, marketing, and profit margins built into a contractor’s quote — make up nearly 40 to 60 percent of the average $30,000 professional installation price.
The DIY route cuts straight through that. You pay for the equipment. You do the work. You keep the savings. But let’s be completely honest: this is not a weekend project you can wing. You will be on a roof handling high-voltage DC electricity, drilling through your shingles, and filing paperwork with your city and utility company.
Done correctly, your system will produce clean electricity for 25 to 30 years. This guide walks through every step — from the day you decide to go solar all the way to the moment your utility meter starts spinning backward.
Before You Start: Know Your System Size
Before buying equipment, you need to know how many panels your home requires. Read our Solar Panel Calculator guide first — knowing your system size upfront prevents buying too many or too few panels and saves significant money.
Is DIY Solar Installation Legal in Your State?
Yes — in almost every US state, homeowners are legally allowed to install their own solar systems. However, “DIY” does not mean “unregulated.” You still need permits, inspections, and utility approval in most cases.
| Requirement | Who Needs It | Typical Cost | How Long |
|---|---|---|---|
| Building permit | All grid-tied and most off-grid roof installs | $100–$500 | 2–6 weeks (or hours via SolarAPP+) |
| Electrical permit | All grid-tied systems; most off-grid if AC connected | $75–$300 | Issued with building permit in most jurisdictions |
| Utility interconnection agreement | All grid-tied systems wanting net metering | Free–$200 | 2–6 weeks; apply at same time as permits |
| HOA approval | HOA community members only | Free–$50 admin fee | 2–4 weeks; federal law protects your right to install |
| Utility Permission to Operate (PTO) | All grid-tied systems — issued after passing inspections | Free | 1–4 weeks after inspection approval |
SolarAPP+ — The Permit Shortcut for 2026
Many US jurisdictions now use SolarAPP+, an automated online permit approval system built by NREL that can issue permits in hours instead of weeks for qualifying systems. Check whether your city or county uses it at solarapp.nrel.gov. If your area qualifies, this is the single biggest time-saver in the entire DIY solar process.
The Plug-In Solar Exception (23+ States)
As of early 2026, Utah and 23+ other states have passed plug-in solar laws allowing small systems up to 1,200W to connect directly to a dedicated outdoor outlet — no permit, no utility approval required. If you want to start small and learn solar before committing to a full rooftop installation, this is an excellent entry point.
The Real Savings — DIY vs Professional Cost
The numbers are striking. Here is an exact comparison for a standard 7 kW system sized for a typical 2,000 sq ft US home:
Equipment: ~$8,000–$10,000
Labor (2–3 days crew): ~$4,000–$6,000
Company overhead & profit: ~$5,000–$9,000
Permit handling: ~$500–$1,000
After 30% tax credit: $13,300–$17,500
17 × 400W panels: ~$3,400–$5,100
Inverter (7 kW string): ~$900–$1,600
Racking + hardware: ~$900–$1,400
Wiring + electrical: ~$350–$600
Permits + fees: ~$200–$600
Electrician (AC only): ~$300–$800
After 30% tax credit: $4,200–$7,000
Complete Parts List — What You Need and What It Costs
A grid-tied residential solar system has six core components. Here is exactly what each one does and what it costs in 2026 at DIY direct pricing:
| Type | Best For | Cost |
|---|---|---|
| String inverter | Simple roofs, no shading, budget builds (Growatt, Fronius, SMA) | $800–$2,000 |
| Microinverters | Complex roofs, partial shading, max monitoring (Enphase IQ8) | $150–$250 each |
| Power optimizers + string | Middle ground — shade tolerance without full microinverter cost (SolarEdge) | $1,200–$2,800 total |
Battery Storage — Optional But Valuable
Battery backup is optional for grid-tied systems — you do not need it to produce solar power or qualify for net metering. However, a battery allows you to store excess solar energy for nighttime use and provides backup power during outages. For a comparison of the best battery options, see our guide: LiFePO4 vs AGM Battery for Solar: Which Is Worth It?
Tools You Will Need
You can rent most of these. You do not need to buy everything — a one-time tool rental for a weekend project often costs $50–$150 total:
Safety Equipment — Non-Negotiable
Safety harness (ANSI A10.32 rated for roof work) · Roof anchor and rope · ANSI Z87.1 safety glasses · Non-conductive work gloves · Slip-resistant steel-toe boots · Hard hat. One absolute rule above all others: never work on a wet roof, never work in wind above 20 mph, never skip the harness.
Step-by-Step: How to Install Solar Panels on Your Roof
This walkthrough covers a standard asphalt shingle roof installation for a grid-tied system. The full project takes most two-person teams 2–5 days of actual labor, spread over two to three weekends. Total calendar time is 8–16 weeks due to permits and utility approvals.
Assess Your Roof
Check roof condition first. Solar panels last 25–30 years. If your shingles are more than 15 years old, or you see cracking, curling, or missing granules, replace the roof before installing solar. Adding panels over a failing roof means expensive removal and reinstallation later.
Find your rafters. Every lag bolt that holds your racking system must go into a structural rafter — never just into the plywood sheathing. Use a stud finder from inside the attic, or tap along the decking from the roof and listen for the solid thud vs hollow sound. Mark rafter centers with chalk. Standard spacing is 16 or 24 inches on center.
Map your array layout. Measure usable roof space. Account for required setbacks — most codes require panels to stay at least 18 inches from the roof edge and 36 inches from the ridge. Mark where each rail and panel will go. Take photos of everything for your permit application.
Check roof pitch and orientation. South-facing roofs at a pitch between 15° and 40° produce the most energy in the US. Southwest and southeast orientations work well too. Flat roofs require tilt-mount hardware.
Pull Your Permits
Do not skip this step. Pull permits before you buy equipment or touch the roof. What you need to submit with your permit application:
- Site plan showing roof dimensions and panel placement
- Electrical one-line diagram (shows system connections from panels to main panel)
- Manufacturer spec sheets for your panels, inverter, and racking
- Structural calculations confirming roof load capacity (typically 3–5 lbs/ft²)
Many DIY solar suppliers — Renogy, Wholesale Solar, GoGreenSolar — offer permit plan set services for $200–$800. This is usually worth it. A properly drawn plan set gets approved faster and avoids costly revision rounds.
File your utility interconnection application at the same time. The utility approval process runs parallel to permit approval and often takes longer. Starting both simultaneously prevents delays.
Order and Receive Equipment
Once permits are filed, order your equipment. Lead times from US DIY solar suppliers typically run 1–3 weeks. Order while permits are being processed to save time.
Inspect every box on delivery. Check panels for micro-cracks by looking at them in bright sunlight at a low angle. Check inverter boxes for shipping damage. Photograph anything that looks wrong before signing the delivery receipt — you will need photos for warranty claims.
Install the Racking System
Mark and drill lag bolt locations. Use your chalk lines and rafter locations to mark exactly where each standoff will go. Drill a pilot hole first with a small bit to confirm you hit the rafter. You should feel solid resistance — if the drill breaks through easily, you missed. Reposition before drilling the full-size hole.
Install through-flashing on every penetration point. This is the most important waterproofing step in the entire installation. Each standoff requires a flashing that slides under the shingles above the hole and lays over the shingles below. Do not rely on sealant alone — sealant cracks over time. Proper through-flashing is what protects your roof for 25 years.
Torque lag bolts correctly. Most racking manufacturers specify 90–110 inch-pounds. Use a torque wrench, not guesswork. Under-torqued connections work loose in wind. Over-torqued connections crack shingles.
Mount the rails. Aluminum rails attach to standoffs with splice brackets at joints. Use a level on every section — rails must be within 1/8 inch of level across the full array.
Run DC Wiring and Conduit
Before panels go up, run your conduit from the array location down to where your inverter will be mounted — typically in the garage, basement, or on an exterior wall near the main panel. Running conduit after panels are installed is significantly harder.
Use metal conduit (EMT) for all roof-to-inverter runs. Leave enough wire slack at each panel location — a foot of extra slack prevents frustrating reach problems when connecting panel cables later.
For a detailed walkthrough of series vs parallel wiring configurations, see our guide: Solar Panel Wiring: Series vs Parallel — A Visual Guide.
Mount the Solar Panels
Use a panel hoist or rope pulley system to get panels onto the roof safely. Carrying 50-pound panels up a ladder is a two-person job at minimum and should be done with a rope and a guide person on the ground.
Start from the bottom row and work up. Slide panels into mounting clamps on the rails. Do not fully tighten end clamps until the entire row is positioned — you may need to adjust spacing.
Critical rule: Use a torque driver (not an impact driver) when tightening module clamps. Impact drivers apply too much rotational force and can crack the tempered glass on the panel edge. Most manufacturers specify 8–10 Nm for mid-clamps and 10–14 Nm for end clamps.
Connect MC4 panel cables as you go. MC4 connectors snap together with a click and require a special MC4 removal tool to disconnect — regular pliers will damage them. Keep male-to-male and female-to-female connections organized by string before connecting to conduit runs.
Install the Inverter and DC Disconnect
Mount the inverter on a shaded exterior wall or inside the garage within 10 feet of the main electrical panel. Inverters generate heat in operation and should not be in direct sunlight.
Cover your panels with a dark tarp before connecting DC wiring. Shaded panels produce no voltage, which makes this step significantly safer. Even covered, treat all DC wiring as live once panels are installed.
Connect the DC wiring from the roof array to the inverter. Wire the DC disconnect switch between the array and the inverter — this is required by code and allows the array to be safely isolated for maintenance.
Test DC voltage before connecting the inverter. Remove the tarp and use your multimeter to confirm the expected string voltage — typically 200–400V DC for a 7 kW string system. If the reading is unexpected, stop and trace the issue before proceeding.
Connect to the Main Electrical Panel
This is the step where most DIYers hire a licensed electrician. Connecting to your main electrical panel involves working with live 240V AC electricity. If you are not trained and comfortable with this, hire a licensed electrician for this specific step. It typically takes 2–4 hours and costs $300–$800.
Whether DIY or hired out, here is what happens: a dedicated solar circuit breaker is added to your main panel, the inverter’s AC output connects through the AC disconnect to this breaker, the production meter is installed, and the system is tested with a multimeter before the main breaker is closed.
Verify the NEC 120% Rule Before Wiring
The National Electrical Code 120% rule: your solar breaker size plus your main breaker cannot exceed 120% of your panel’s busbar rating. A 200A panel can accept a solar breaker up to 40A. A 150A panel can accept up to 30A. If your existing loads already fill the panel, you may need a panel upgrade or a load center sub-panel before adding solar.
Schedule City Inspections
With installation complete, you need two inspections before turning the system on:
Building inspection: A city inspector verifies your mounting is structurally sound and properly flashed. They check rafter attachment, rail installation, flashing quality, and general roof condition.
Electrical inspection: Verifies wiring, conduit runs, disconnects, and panel connections meet the National Electrical Code and any local amendments.
Most inspections pass on the first visit when the work was done correctly. Have a clean, accessible installation ready. Take photos of all wiring runs before covering them with conduit covers or drywall — inspectors may want to see junction points.
Receive Utility Permission to Operate (PTO)
After passing both inspections, submit your approval documentation to your utility company along with any remaining interconnection paperwork. The utility will send a technician to install a bidirectional net metering meter — typically within 1–4 weeks.
Once you receive your official Permission to Operate letter, you can flip the system on. Not before. Operating a grid-tied system without PTO can result in fines, forced disconnection from net metering, and in some states, a mandatory removal and reinstall of the entire system.
The moment your meter starts spinning backward on a sunny afternoon is one of the most satisfying moments in the entire process. That is your solar system paying you back.
Common DIY Solar Mistakes to Avoid
Lag bolts that go only into sheathing will pull out under wind load — potentially taking your panels with them. Every penetration must hit a rafter. Use a stud finder from inside the attic, mark centers with chalk, and drill a small pilot hole to confirm before the full-size hole. Do not assume regular rafter spacing — verify every single attachment point.
More DIY roof leaks come from improperly flashed solar penetrations than any other cause. Surface sealant alone is not enough — it cracks and shrinks over 25 years. Install proper through-flashing (aluminum flashing slid under the shingles above and over the shingles below) at every single attachment point. This step cannot be rushed.
Installing solar on a roof that needs replacement in three years is the single most expensive DIY solar mistake. You will pay to remove, re-roof, and reinstall — easily adding $5,000–$12,000 to your project. Assess roof condition before spending a single dollar on equipment.
Some utilities will refuse to honor net metering credits and demand a formal application restart if they find evidence you operated before receiving Permission to Operate. The waiting period is frustrating — your system is sitting there generating power you can not use — but operating illegally costs far more than waiting.
Impact drivers apply sudden rotational force that far exceeds the torque spec for panel mounting clamps. A cracked panel frame voids your 25-year warranty and can eventually allow water into the panel. Always use a proper torque driver set to the manufacturer’s specification — typically 8–14 Nm depending on the clamp type.
Undersized wire in a solar installation runs hot, creates resistive losses that reduce your system output by 2–5%, and is a fire hazard. Always match wire gauge to the current rating in the National Electrical Code. For most residential solar string runs, 10 AWG PV wire is standard. Long runs (over 50 feet) may require stepping up to 8 AWG.
Full Project Timeline
Understanding the full calendar timeline before you start prevents the most common frustration in DIY solar — expecting to be generating power quickly and running into multi-week waits for permits and utility approval.
| Phase | What Happens | Typical Duration | Can Be Parallelized? |
|---|---|---|---|
| Roof assessment + system design | Measure roof, locate rafters, calculate system size, choose equipment | 1–2 days | Start here |
| Permit application | File building permit + electrical permit with city | 2–6 weeks | File utility app same day |
| Utility interconnection application | Submit to utility; runs parallel to city permit | 2–6 weeks | ✅ Yes — runs with permits |
| Equipment ordering + delivery | Order after permits filed; delivery during permit wait | 1–3 weeks | ✅ Yes — order during permit wait |
| Physical installation | Racking, panels, wiring, inverter, electrical connection | 2–5 days labor | After permit approved |
| City inspections | Building + electrical inspections | 1–3 weeks to schedule | Both can be same-day visit |
| Utility PTO | Submit inspection approval, utility installs new meter | 1–4 weeks | Final step |
| Total calendar time | From decision to first power produced | 8–16 weeks | Parallelizing saves 4–6 weeks |
When to Call a Pro Instead
DIY solar is not right for every home or every homeowner. Be honest with yourself about these situations:
| Situation | Recommendation | Why |
|---|---|---|
| Roof with multiple pitches, valleys, or heavy shading | Hire a pro | Complex layouts require engineering calculations beyond most DIY skill levels; shading analysis needs professional software |
| Electrical panel older than 20 years or at capacity | Hire electrician | Older panels may have unsafe wiring that should be replaced by a professional; this is a code and safety issue |
| High-wind or high-snow-load zone | Hire a pro | Wind and snow load calculations must be engineer-stamped in many jurisdictions for high-exposure zones |
| Not comfortable at heights or reading wiring diagrams | Hire a pro | Roof safety is not a skill you learn on the job. Falls are the leading cause of DIY construction fatalities. |
| HOA with strict appearance requirements | Consider pro | Professional installations come with formal documentation and aesthetic planning HOAs are less likely to dispute |
| Simple south-facing roof, comfortable with tools and heights | DIY is excellent | This is exactly the scenario DIY solar was designed for — maximum savings, manageable complexity |
Know Your Exact System Size Before You Buy
Use our free Solar Panel Calculator — enter your monthly kWh usage and state to get your exact panel count, system cost estimate, and 25-year savings projection.
Frequently Asked Questions
Can I install solar panels myself without an electrician?
You can handle the structural work — racking and panel mounting — and DC wiring yourself in most US states. However, most DIYers hire a licensed electrician specifically for the AC connection to the main panel, which involves live 240V wiring. This step typically costs $300–$800 and takes 2–4 hours. Some states allow licensed homeowners to pull their own electrical permit for this step; others require a licensed electrician. Check your local jurisdiction’s rules before deciding.
Do I need a permit to install solar panels myself?
Yes, in nearly all US jurisdictions. You need at minimum a building permit and, for grid-tied systems, an electrical permit and a utility interconnection agreement. Operating without permits can void your homeowner’s insurance, create liability if there is a fire or structural issue, and make your system difficult or impossible to sell with the house. Permit fees typically run $100–$500. Check solarapp.nrel.gov to see if your city uses the expedited SolarAPP+ system.
How much can I save by installing solar myself?
Most US homeowners save $8,000–$15,000 by going DIY compared to hiring a full-service installer. Labor and soft costs — company overhead, marketing, and profit margins — account for 40–60% of the average $30,000 professional solar installation quote in 2026. A complete 7 kW DIY system typically costs $6,000–$10,000 before the 30% federal tax credit, compared to $19,000–$25,000 professionally installed.
Does DIY solar qualify for the 30% federal tax credit?
Yes, fully. The 30% federal Investment Tax Credit (ITC) applies to DIY solar systems installed through 2032. You claim it on IRS Form 5695. Equipment costs, permit fees, and any licensed electrician costs you hire out all qualify for the credit. Your own unpaid labor time does not qualify. The credit reduces your federal tax liability dollar-for-dollar — it is not a deduction but a direct credit. Once your system has Permission to Operate, don’t forget to claim the 30% federal solar tax credit on IRS Form 5695 — it could save you $2,000–$8,000 on your next tax return.
What size system do I need for a 2,000 sq ft home?
Most 2,000 sq ft US homes need 15–22 solar panels rated at 400W each, forming a 6–9 kW system. The exact number depends on your annual electricity usage, your state’s peak sun hours, and your target offset percentage — not the square footage itself. Use our Solar Panel Calculator to get your precise panel count based on your location and real usage data.
How long does DIY solar installation take?
The physical installation takes 2–5 days of labor for a two-person team. Total calendar time from permit application to utility Permission to Operate is typically 8–16 weeks. Most of this wait is the permit approval process (2–6 weeks) and utility interconnection review (1–4 weeks after inspections pass). To minimize the timeline, file your permit application and utility interconnection application on the same day, and order equipment during the permit wait period.
What is the most common DIY solar installation mistake?
Missing rafters when drilling lag bolt attachment points. Every mounting lag bolt must penetrate into a structural rafter — never just into plywood sheathing. Bolts that only go into sheathing will eventually pull out under wind load, potentially pulling panels off the roof in a storm. Use a stud finder from inside the attic to locate and mark every rafter before drilling, and drill a small pilot hole to confirm you hit solid wood before drilling the full-size mounting hole.
Continue Your Solar Education
- Off Grid Authority — DIY Solar Panel Installation: The Complete Step-by-Step Guide (2026), March 2026
- EcoFlow — DIY Solar System Guide 2026: Components, Costs, and Installation Tips, March 2026
- SolarTechOnline — Complete DIY Solar Panel System Guide 2025: Save $20,000+, December 2025
- Solar Permit Solutions — Essential Tools For Installing Solar Panels Yourself, February 2026
- NearbyHunt — Solar Panel Roof Installation: Mounting Guide 2026, March 2026
- GreenLancer — How to Get a Solar Permit: Requirements, April 2026
- Anker SOLIX — Cost to Install Solar Panels Yourself: 2026 Guide, June 2026
- NREL — SolarAPP+ Automated Permitting System, solarapp.nrel.gov
- National Electrical Code (NEC) — Article 690 Solar Photovoltaic Systems, 120% Rule
- IRS — Form 5695, Residential Energy Credits (30% ITC through 2032)
5 thoughts on “DIY Solar Panel Installation: The Complete Beginner Guide (2026)”