Solar Inverter Error Codes: How to Read Your Display and Fix Them (2026)
Most solar inverter errors fall into 5 categories: overload, overheating, low/high battery voltage, ground fault, and communication faults. Overload and overheating are the most common and usually fixed by reducing connected load or improving ventilation. Low battery voltage during sunny daylight points to a charging problem upstream, not the battery itself. Ground fault errors are safety-critical and should be inspected before resetting repeatedly. Numbered codes (E001, F03) are brand-specific — always check your exact inverter model’s manual.
Every solar inverter eventually throws an error code — it’s how the unit protects itself and your system from damage. The problem is that most displays show cryptic codes or symbols with no explanation, leaving people unsure whether it’s a five-minute fix or a sign their inverter is dying. This guide decodes the most common errors across major brands and gives you the exact troubleshooting steps for each.
Part of the Shalkot DIY Solar Series
For sizing an inverter correctly from the start, see What Size Inverter Do I Need?. For charge controller troubleshooting, see Best Solar Charge Controller for 400W Systems. For battery issues, see LiFePO4 vs AGM Battery.
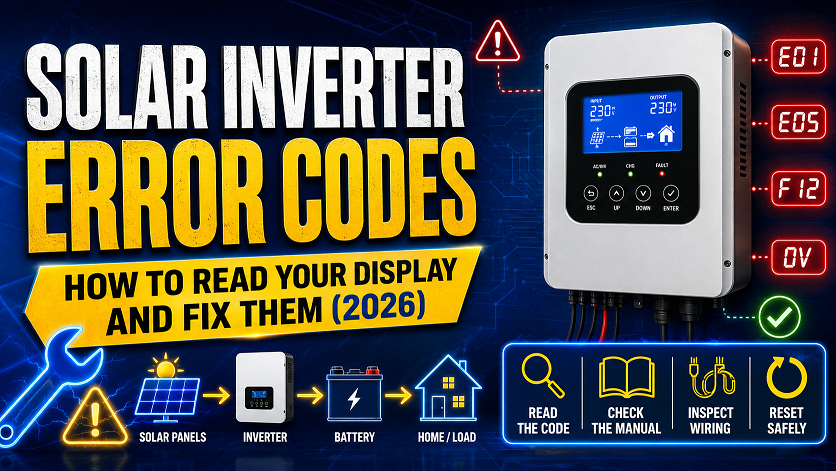
How Solar Inverter Displays Work
Most inverters communicate status through one of three display types: an LCD screen showing live numbers (voltage, watts, frequency), a simple LED indicator system (different colors and blink patterns), or an alphanumeric code display (E001, F03, Err5). Higher-end inverters with app connectivity, like Victron and many Renogy models, also push plain-language fault descriptions to a smartphone app even when the physical unit only shows a code.
| Display Type | What It Shows | Common Brands |
|---|---|---|
| LED indicator only | Green = normal, Red/blinking = fault, sometimes amber = warning | Budget inverters, basic charge controllers |
| LCD with live readout | Real-time voltage, watts, frequency, battery %, plus fault codes when triggered | Mid-range Renogy, Giandel, EPEver |
| App-connected (Bluetooth/WiFi) | Plain-language fault descriptions, historical data, remote alerts | Victron, Renogy One, EcoFlow |
Skip the cryptic code-guessing entirely — the VictronConnect app translates every fault into plain English with a suggested fix, plus historical charge data to catch problems before they trigger an error.
Interactive: Common Display Readouts Explained
Click each button below to see what a typical inverter display looks like for that condition, and what it means.
The inverter is operating normally, converting 450W of DC power to AC with a healthy 12.8V battery reading.
Overload Errors — Causes and Fixes
Overload is the single most common solar inverter error. It happens when connected devices draw more power than the inverter’s rated continuous capacity, or when one device’s startup surge briefly exceeds the surge rating.
| Symptom | Likely Cause | Fix |
|---|---|---|
| Error appears immediately when a specific device turns on | That device’s startup surge exceeds inverter surge rating | Run that device alone, or upgrade to a larger inverter |
| Error appears gradually as more devices are added | Combined continuous load exceeds inverter’s rated watts | Unplug devices until under the rated continuous watt limit |
| Error appears with only one small device connected | Inverter is undersized for the system, or internal fault | Check inverter rating matches your needs; if correct rating, may be a fault |
| Error clears on restart but returns quickly | A load is still drawing more than rated even after “fixing” | Use a watt meter to verify actual draw of each device |
Plug any device through this meter to see its exact running watts and startup surge in real time. The fastest way to identify which device is triggering your inverter’s overload protection.
Overheating Errors — Causes and Fixes
Inverters generate heat as a natural byproduct of converting DC to AC power, and most have an internal temperature cutoff to prevent component damage. This error is especially common in enclosed cabinets, hot climates, and sustained high-load situations.
- Improve airflow — never mount an inverter in a fully sealed cabinet; most need at least 6 inches of clearance on all sides for proper convection cooling.
- Reduce sustained load — running near maximum continuous output for hours generates more heat than the same total energy used in shorter bursts.
- Check for blocked vents — dust buildup on cooling fins or fan intakes is a common, easily overlooked cause in older installations.
- Consider ambient temperature — an inverter mounted in direct sun or an unventilated engine bay will run hotter than the same unit in shade.
- Let it cool fully before restarting — restarting immediately after an overheat shutdown often triggers the same error again within minutes.
Low and High Battery Voltage Errors
| Error Type | What’s Happening | Most Likely Cause |
|---|---|---|
| Low voltage cutoff | Battery dropped below safe discharge threshold | Undersized battery for your load, or charging isn’t keeping up |
| Low voltage during full sun | Battery isn’t charging despite available solar production | Loose/corroded panel connection, faulty controller, shaded panels |
| High voltage warning | Charging voltage exceeded safe upper limit | Charge controller misconfigured for battery chemistry, or controller fault |
| Voltage fluctuating rapidly | Connection issue or failing battery cells | Loose terminal connections, corroded cable ends, aging battery |
Always Check the Charge Controller First for “Low Battery” During Daylight
If your inverter shows a low battery error while the sun is clearly out and your panels should be producing power, the problem is almost never the battery itself — it’s somewhere between the panels and the battery. Check your charge controller’s display for actual charging current. Zero or near-zero charging current with full sun on the panels points to a loose MC4 connector, a tripped breaker, or a failed charge controller, not battery degradation.
Test actual battery voltage under load, check for voltage drop across connections, and verify charge controller output — the single most useful tool for diagnosing any solar electrical fault.
Ground Fault Errors — Safety Critical
Unlike overload or overheat errors, a ground fault should never simply be reset and ignored if it recurs. It indicates current is finding an unintended path to ground, which can mean damaged insulation, water intrusion, or a wiring mistake — all of which carry shock or fire risk.
Do Not Repeatedly Reset a Recurring Ground Fault Error
If a ground fault error clears on reset but returns within minutes or hours, do not keep resetting and using the system. Inspect all visible wiring, connectors, and junction boxes for moisture, corrosion, chafed insulation, or rodent damage. If you cannot identify and fix the source within one thorough inspection, disconnect the system and have a qualified solar electrician diagnose it before continuing use.
- Check for water intrusion — junction boxes, connectors, and panel backsheets are common entry points after storms or irrigation spray.
- Inspect wire insulation — look for chafing where wires pass through metal edges, grommets, or tight bends.
- Check for rodent damage — chewed wire insulation is a surprisingly common cause in vans, RVs, and outdoor ground-mount systems.
- Verify grounding connections — a loose or missing ground connection can sometimes trigger false-positive ground fault readings on sensitive inverters.
Error Codes by Brand: Renogy, Victron, EPEver, Growatt
Numbered codes are not standardized across manufacturers — the same code can mean different things on different brands. Here’s a general reference, but always confirm against your specific model’s manual.
| Brand | Typical Code Format | Where to Look Up Exact Meaning |
|---|---|---|
| Renogy | E01–E20 numeric codes, or plain LCD text | Renogy app (for Bluetooth models) or printed manual fault table |
| Victron | Plain-language alerts via VictronConnect app | App shows full description automatically — best brand for clarity |
| EPEver | E01–E07 short numeric codes on LCD | Printed manual fault table (codes are model-specific) |
| Growatt (grid-tied) | Numeric fault codes 01–99, displayed on screen and app | Growatt ShinePhone app or installer portal lookup table |
| Giandel | LED blink patterns + occasional LCD code | Printed manual — count LED blinks against the fault table |
Keep a Photo of Your Inverter’s Fault Code Table
Before you ever need it, take a clear photo of the error code reference page in your inverter’s manual and save it to your phone. When an error appears at an inconvenient time (during a storm, while traveling in an RV, etc.) you’ll have the reference instantly without digging through a paper manual or searching online with spotty signal.
How to Prevent Most Errors From Happening
| Prevention Step | Prevents |
|---|---|
| Size your inverter with 20-25% headroom above your actual loads | Overload errors |
| Mount with proper clearance and avoid direct sun on the unit itself | Overheating errors |
| Size your battery bank to your actual daily energy use, not guesswork | Low battery cutoff errors |
| Use a quality MPPT controller matched to your panel and battery specs | Charging-related low battery errors |
| Inspect wiring annually for chafing, corrosion, and moisture | Ground fault errors |
| Clean terminal connections and re-torque periodically | Voltage fluctuation and intermittent faults |
Best Diagnostic Tools 2026
- The single most useful tool for diagnosing any solar electrical fault
- Auto-ranging means no manual dial adjustment — point and read
- Checks battery voltage, connection integrity, and continuity
- Essential for confirming whether a “low battery” error is actually a wiring issue
- Plug any AC device through it to see exact running watts and surge
- Fastest way to identify which device triggers overload errors
- Confirms whether your inverter sizing matches your actual loads
- Useful for general energy audits beyond just troubleshooting
- Translates every fault into plain English with suggested fixes
- Historical charging data helps catch problems before they become errors
- Best-in-class app experience — no manual code lookup needed
- If your current controller gives cryptic codes, this solves it permanently
- Shows exact state of charge — voltage alone can’t tell you this accurately
- Spots a failing battery before it causes repeated low-voltage errors
- Tracks charge/discharge current to confirm your panels are actually charging
- Essential add-on for any system that’s thrown unexplained battery errors
Make Sure Your Inverter Was Sized Correctly in the First Place
Many overload errors trace back to an undersized inverter. Use our free Inverter Size Calculator to confirm your unit matches your actual loads.
Frequently Asked Questions
What does an overload error mean on a solar inverter?
An overload error means connected devices are drawing more continuous power than the inverter’s rated capacity, or a single device’s startup surge exceeded the surge rating. Unplug devices until total load drops below the rated watts, then restart. Use a watt meter to identify exactly which device is causing the issue.
Why does my solar inverter show a low battery error during the day?
This usually means your charge controller isn’t properly charging the battery despite available sun. Check for a loose panel connection, shaded panels, or a faulty controller. Use a multimeter to verify actual charging current — zero current with full sun means the problem is upstream of the battery.
What does a ground fault error mean and is it dangerous?
A ground fault means current is leaking to ground through an unintended path — potentially damaged wiring, water intrusion, or a wiring mistake. This is safety-critical. Don’t repeatedly reset it; inspect all wiring for damage or moisture, and consult a qualified electrician if you can’t identify the cause.
Why does my solar inverter keep restarting or cycling on and off?
This usually points to battery voltage hovering right at the low-voltage cutoff, a loose DC connection, or an internal fault. Check actual battery voltage under load with a multimeter — if it’s dropping below cutoff, you need a larger battery bank or reduced load, not a new inverter.
What does an E001 or similar numbered error code mean?
Numbered codes are manufacturer-specific and vary between brands — the same number means different things on different inverters. Always check your specific model’s manual or the manufacturer’s error lookup table. App-connected inverters like Victron units display plain-language descriptions even when the physical screen only shows a code.
How do I reset my solar inverter after an error?
Turn the unit off, wait 30-60 seconds for internal capacitors to discharge, then turn it back on. For persistent errors, disconnect all loads first, then the battery, wait a full minute, reconnect the battery, and add loads one at a time. If the error returns immediately with no loads connected, the fault is internal or in the battery connection and likely needs professional diagnosis.
Continue Your DIY Solar Build
- Renogy — Inverter and Charge Controller Fault Code Reference Manuals, 2026
- Victron Energy — VictronConnect App Documentation and Alert Reference, 2026
- EPEver — MPPT Controller Error Code Tables, 2026
- Growatt — Grid-Tied Inverter Fault Code Lookup and ShinePhone App Guide, 2026
- DIY Solar Power Forum — Community Troubleshooting Threads and Common Fixes, 2026
- National Electrical Code (NEC) — Ground Fault Protection Requirements for PV Systems, 2026